
Bitbucket is a hosting site for the distributed version control systems (DVCS) Git and Mercurial more
Bitbucket offers two types of repositories.
- Public – available to all the users around the globe.
- Private – only invited users have access (read, write, admin
You must have at least read only access to work with bitbucket repository. There are several steps to follow when working with bitbucket in development process.
Downloading code from bitbucket for development
Before starting any changes, we need to have the source files. Bitbucket documentation suggests that you follow the steps given below.
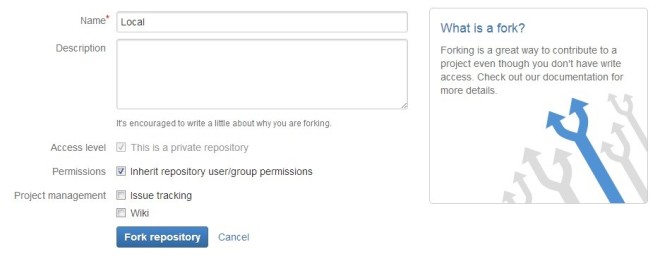
- Create a Fork of the repository. (Forking a repository creates a new repository under your online bitbucket account. This new repository is a copy of the original repo and is called a fork.)

- Clone the forked repo from Bitbucket to your local system. On your local system execute the following command to clone the bitbucket repository.$ git clone https://username@bitbucket.org/user/repo-name.git
- There is a possibility that git gives you an error; (error: SSL certificate problem, verify that the CA cert is OK.)
If this is the case, then you have three solutions to resolve this error.
- Execute each git command with this format.
$ env GIT_SSL_NO_VERIFY=true git clone ………
- Execute the following command in your repository folder to temporarily disable SSL
$ git config http.sslVerify false
- Execute the following command to disable SSL on all local commands
$ git config –global http.sslVerify false


Uploading changes at bitbucket
After downloading the code, you can make any changes which you need to resolve the issues. And once you are finished with changes you can push your changes at bitbucket. The steps to push changes at bitbucket are given below.
- Start git bash and move in the local directory (using cd command) where your bitbucket repository is residing.
- Execute the following git commands.
- $ git add .
- $ git commit –m “your comments about this change”
- $ git push –u origin local-branch-name (to push one local branch at bitbucket) OR
- $ git push –u origin –all (to push all local branches at bitbucket)
Merging changes on bitbucket
Since you created a fork to work with, so after pushing changes at bitbucket you need to merge the changes with your original repository. Below are the steps to merge changes at bitbucket.
- Go to the fork repository.
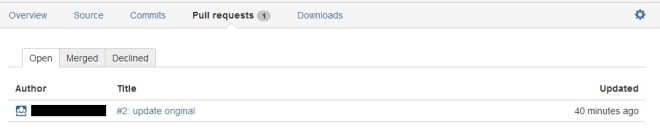
- Click on Pull Request link.

- It will display Create Pull Request page. Select source branch, destination branch and provide title and description of the Pull Request.

- If there are any conflicts, the screen will also show the conflicts and the commands to resolve the conflicts. And Pull Request with conflict cannot be merged automatically.
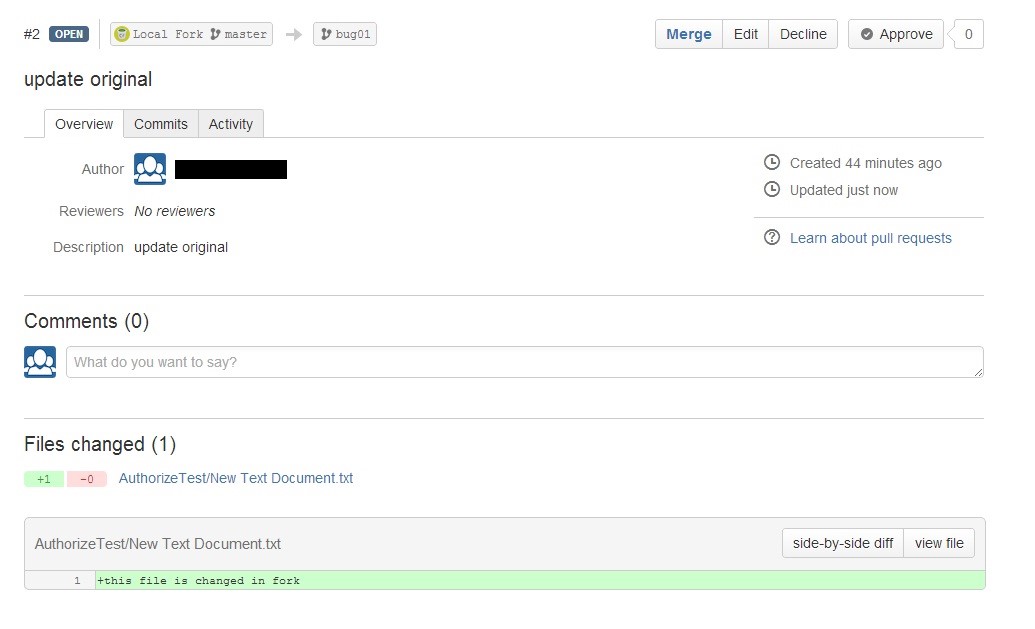
- When you create a Pull Request, the administrator of original repository will see list of Pull Requests in his repository.
- The administrator can view details of any Pull Request by clicking on its title.
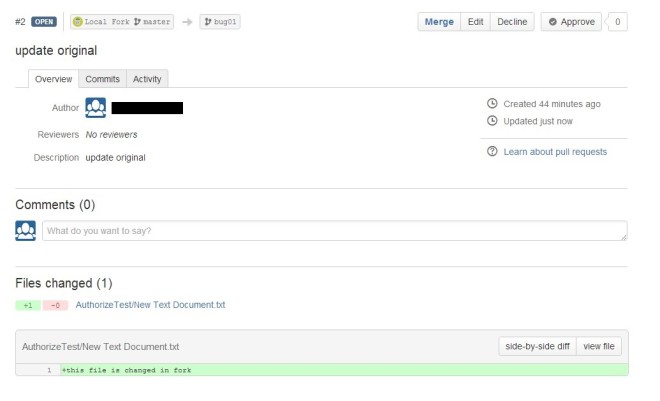
- Administrator can Merge, Edit, Decline or Approve any Pull Request.
- After merge process, the changes of the source branch of Pull Request, will be available in the destination branch mentioned in the Pull Request.


 The following are commonly asked interview


